Showing posts with label Beef Recipes. Show all posts

Sunday, June 14, 2015

Bistro quality burger

A burger topped with caramelized onion and blue cheese spread. Yum...


For the caramelized onions:
4 large onions, sliced
2 tbsp butter
1 tbsp olive oil
Salt

For the burger patties:
3 lb ground chuck
1 lb ground sirloin
Garlic salt
Pepper
Onion powder
Smoked paprika
Cumin
Chili powder
Dried parsley
Cayenne pepper

For the blue cheese sauce:
1/4 c mayo
1/4 c fat free sour cream
1 garlic clove, minced
1 tbsp lemon juice
2 tbsp chopped chives
.3 lb crumbled blue cheese
Salt and pepper to your liking 

For the burgers:
12 Kaiser Buns
Arugula for topping

To caramelize onions:
Heat butter and olive oil in a Dutch oven over medium heat. Add the onions and generous pinch of salt. Occasionally stir and cook for about an hour until the onions are caramelized. 

To prepare the burger:
Mix both ground meat together and portion out the meat to 1/3 lb each. You should get 12 patties after portioning them out. Shape them into parties. Next season the parties with the garlic salt and next 7 spices. Grill the burger patties to your liking. 

To prepare the blue cheese sauce:
Mix all the blue cheese sauce ingredients together in a small bowl. Chill in the fridge until ready to serve. 

To serve:
Toast the buns with a little olive oil, salt and pepper. Place one cooked burger patty on a bun, top with caramelized onions, arugula, and the blue cheese sauce. 


Thursday, June 14, 2012

Anniversary dinner: Veal, Risotto, and Truffles

When you cook every night, what do you do for a special occasion? Cook a very fancy, expensive meal! That's what I surprised my husband with on our 3rd wedding anniversary. This meal turned out perfect. If I had a restaurant, I would definitely serve this.

This veal dish is very similar to a Veal Marsala. Instead of using Marsala though, I used Cognac.It was a nice touch, not overpowering. The mushroom cognac sauce paired so well with the veal. And the risotto was so creamy and delicious. You really get that nice, fragrant mushroom aroma from the fresh summer truffles. We really, really loved this dish and I hope you will give it a try to see why...


Veal Scallopini with a Mushroom Cognac Sauce

4 veal scallopini
flour
1/2 c cognac
1 c beef stock
1 garlic clove, minced
1 pint bella or cremini mushrooms, sliced
2 tbsp butter
1 tbsp olive oil
salt and pepper


1. Lay the veal in saran wrap and gently pound the veal out a bit. Then lightly coat with some salt, pepper, and flour. In a deep skillet over medium high heat, add 1 tbsp butter and olive oil. Brown the veal, about 3 mins on each side. Transfer to a plate while you make your sauce.
2. Deglaze the pan with the cognac. Scape up the browned bits, and let the cognac reduce by half. Add the beef stock, garlic, and mushrooms. Let the sauce reduce by half. Finish with a tbsp of butter. Spoon the sauce over the veal and serve alongside these creamy risotto:


Risotto with Asparagus and Truffles

1 tbsp butter
1 tbsp olive oil
1/2 shallot, diced
1 1/2 c arborio rice
1/2 c white wine
6 c chicken broth
1 bunch asparagus
0.3 lb brie
3 whole black summer truffles (1.4 oz jar)

1. Prepare your asparagus: Snap off the lower woody ends of the asparagus and discard it. (It will naturally break where it should.) Then using a vegetable peeler, peel off the outer layer on the bottom of the asparagus. (If you've never peeled your asparagus stems, I encourage you to do so. Ever since I discovered the tender taste of peeled asparagus I haven't prepared my asparagus any other way.) Cut your asparagus into your desired bite size. (Mine was about an inch long.) Blanch the asparagus in gently boiling water for 1-2 mins. Drain in a colander and run cold water over them to stop the asparagus from cooking. Set aside.
2. In a small saucepan, heat up the chicken broth. When it's warmed, keep the broth over low heat.
3. In a large saucepan, heat the butter and olive oil over medium heat. Cook the shallots until translucent. Then add the rice and cook for a few mins. Add in the wine and cook until all the wine is absorbed. Then slowly add in a ladle of the warm chicken broth. Stir and cook until all the broth is absorbed. When the broth is absorbed, add another ladle of broth. Repeat process with the rest of the broth. (It will take about 30 mins.)
4. When you have a cup of broth left to add, go ahead and add your asparagus from earlier into the risotto. After all 6 cups of broth has been absorbed into the risotto, add 3/4 or all of the brie. (I, of course, added all the brie because we love cheese. But depending on your preference you can add as much as you'd like. I also tore the brie into smaller pieces to make incorporating easier.) Then with a microplane or grater, grate/slice the truffles into the risotto. Also add the truffle oil from the jar...you don't want to waste that flavor! Serve and enjoy your restaurant worthy meal at home.
Note: You can prepare your asparagus the day before like I did. Because the peeling can take some time and it was a workday, I wanted to prep the asparagus beforehand. And yes, do peel your asparagus. Even though it's time consuming it's very much worth it!


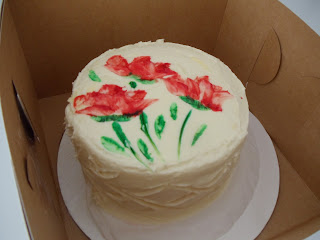
Matt surprised me with our wedding cake from Cecilia's Cakes...mmm!


And surprised me with flowers at work..so sweet :)


Thursday, June 7, 2012

Awesome taco filling/nacho topping

I have a very special guest blogger for you all today! The famous Matt Hawkins! Yup, the guy I'm always talking about in my blog posts / my wonderful husband. Matt likes to cook too and last night he made these amazing tacos. It was so good he was saying how he needs to remember this recipe. So I was like, why not blog about it! So readers, I'd like you to meet Matt!:


You will need:

For the meat:
2.5-3lb ground beef
2 cloves garlic (minced)
Smoked paprika
Chili powder
Onion powder
Salt, pepper

For the veggies:
3 medium tomatoes (seeded, diced)
1 medium red onion (diced)
1 bell pepper (diced)
1 lime (split in half)
Cilantro (to taste) diced
Salt

Cheese of choice (I used a blend of cheddar and Queso Gran (which is like manchego))
Corn tortillas (deep fried, so start heating the oil now)

First make the veggie topping, combine the bell pepper, red onion (why are they called red onions, anyone can see they are purple onions!), tomato (I like to remove the seeds and “juicy” parts for 2 reasons: 1) I don't like the taste, and 2) It will turn your little salsa into a mushy mess) and cilantro in a mixing bowl. Drizzle the lime juice on top and add salt to taste. Mix it up well and put in the fridge while you prep the tortillas and beef. 

For the ground beef, sauté the garlic in a little bit of olive oil for about 2-3 minutes over medium heat. Next season the beef with salt and pepper and add it to the pan, separate the clumps so you can mix it up well in the pan (or pot). Now add the chili powder, onion powder,and paprika. You're aiming for a ratio of about 3:1:1 for these three seasonings,but feel free to adjust to your personal taste. Once the meat is browned, drain off the grease and set it aside until your chips/tacos are prepared.

Make sure your oil is nice and hot 350 degrees or so. You can either make tacos or nachos with your corn tortillas. If you're going for nachos then slice the tortillas into triangles and fry them in batches. Be careful of the rising oil, you don't want it to spill over and make a mess or worse, burn you. The nachos at the hospital aren't as good as these.Alternatively, you can make tacos from the shells. If you have a fancy-pants taco frying device, use that! Alternatively you can use tongs to hold them in a taco-type shape. One of the best methods I found was to drop the tortilla round in the oil, when it starts to rise up and float, press down in the center with the tongs. Hold it like that until it is nice and crispy (chewy tacos aren't very good) about 1-2 minutes. You can also use a dual-wielding technique with two sets of tongs to hold both ends of the shell in a taco shape. You're tacos might come out slightly misshapen, that's okay; just like the ugly duckling,these shells taste a million times better than the ones you get out of the box.

Alright, now you're ready to build! You really shouldn't need directions for this part, but just in case:
1) Take a shell/chips
2) Pile on some meat!
3) Stack it with cheese!
4) Add the veggie mix!
5) EAT!
6) Repeat as desired

Friday, April 8, 2011

Grilled BBQ Ribs

We had a ton of sides leftover but nothing to go with it. I saw we had a rack of ribs and decided to throw it on the grill since it was nice out. First I let it sit at room temperature, while the grill was warming up, marinading in the spice rub I threw together with some pantry items: salt, pepper, garlic powder, onion powder, cumin, red chili powder. I made sure to keep the grill around 300-400 degrees F. Grilled it for 30 mins total (covered) making sure to turn it constantly. You can adjust the time for smaller racks, mine was thick. (Note: When the top of the ribs where the fat is was grilled, I avoided having it contact the grill again - so it wouldn't burn.) During the last 10 mins I brushed some of my BBQ sauce I had made on all sides, reserving some for dipping. It turned out really good! The best part about it was that it was an impromptu dish with pantry items, and took less than 30 mins. You gotta love that!