Sunday, December 2, 2012
Lemon Thyme Porkchop
You know how I love to throw leftover ingredients together. I hate waste. This dish was one of those occasions. For these 2 bone-in porkchops, I seasoned it with salt, pepper, about a teaspoon of dried thyme, and the juice of half a lemon I had laying around. Then I dunked it in an egg wash bath (comprised of 1 egg and about a teaspoon of milk, beaten). We also had some old, hard French bread that I had processed into breadcrumbs. I combined about 1/4 c of that with about 2 tbsp of grated black pepper parmesan. Sprinkled the seasoned bread crumbs over the porkchops and cooked it over medium heat, 5 mins per side. It was a pretty quick and delicious Milanese!
Saturday, December 1, 2012
Orange Thyme Porkchops
I wanted to try something new with a couple of bone-in porkchops. I was gonna use the lemon half I had left over, but thought why not use the orange that's been sitting in my fruit bowl. It could act as the citrus, right? I rubbed the orange zest of one orange, seasoned with some salt and pepper, and added about a teaspoon of thyme to the porkchops. Cooked it for about 5 mins per side over medium heat. When we bit into those chops, I thought, "good thing I didn't add some of that orange juice!" That little bit of orange zest really came through. We were shocked, but it wasn't bad.
Saturday, November 3, 2012
Cod Fillet Sandwich with Cilantro Cabbage Slaw
I was going for a light fish sandwich. The store didn't have mahi-mahi like I wanted, so I decided to try the cod. It worked and tasted good, but the cod fillet didn't hold up as well as mahi-mahi could have. The fillet broke apart so I ended up stacking pieces of fish onto the sandwich. But you can try out any other white fish you'd like.
The star of this dish was the slaw. It was so light and refreshing. The Greek yogurt added tang to the slaw, and the cilantro added the flavor. It can even be enjoyed as a side dish.
Cod Fillet Sandwich - with Cilantro Cabbage Slaw
Ingredients
4 cod fillet (or any white fish)
4 buns
1 small savoy cabbage, sliced
1/2 c cilantro, chopped
1/2 lime, juiced
1 c nonfat, plain Greek yogurt
4 tbsp mayo
1/2 tsp garlic powder
1/2 tsp seasoned salt
salt and pepper
butter or olive oil
1. Prepare the slaw: Mix the cabbage, cilantro, lime juice, Greek yogurt, mayo, garlic powder, seasoned salt, 1 tsp salt, and 1/2 tsp pepper together. Let it chill in the fridge while you prepare the fish. (That way the flavors can develop as well.)
2. Prepare the fish: Season both sides of the fish with salt and pepper. In a skillet over medium heat, add olive oil. Cook the fish about 3-5 mins on each side.
3. Assemble: Butter and toast the buns. Then top with a fish fillet and some slaw. Enjoy!

Monday, October 8, 2012
Pan-Seared Scallops
At first I was just gonna sear up some large scallops. Then I thought I could make a quick white wine reduction to go with it. Next thing you know I'm whipping up some creamy polenta as well. Our meal went from being a simple dish to a more fancy one in just 30 mins. And the best part was I only had to buy the scallops. I had everything else in the fridge or pantry already. Don't you love it when that happens??
 Pan-Seared Scallops
over a bed of creamy polenta, all topped with a decadent white wine reduction
My personal food critic said this was the best thing he's ever eaten, and not just from what I've cooked. But he may be a bit biased since he's my husband :)
Ingredients:
2 c milk
2 c water
4 tbsp butter
1 c yellow cornmeal
1/2 c ricotta
2 tbsp Romano cheese, grated
12 large scallops
1/2 c white wine
1 large garlic clove, minced
2 tbsp parsley, chopped
salt and pepper
olive oil
1. Prepare the polenta: Bring milk, water, 2 tbsp butter, salt to taste to a boil in a medium saucepan. Whisk in the cornmeal and simmer for about 30 mins, partially uncovered. Add a little bit more water or milk if the polenta looks dry. When finished cooking, stir in both cheeses. Add salt and pepper to taste.
2. Prepare the scallops: Heat some olive oil in a skillet over medium-high heat. Salt and pepper the scallops. Sear the scallops about 2-3 mins on each side. Set aside on a cooling rack while you prepare the sauce. (Setting the cooked scallops on a cooling rack helps keep the crispy sear on the scallops.)
3. Prepare the sauce: Deglaze the pan with the wine. Add the garlic. Let it reduce by half. Then stir in the remaining butter and the parsley.
4. Prepare for eating: On your serving dish, add some polenta. Then top with scallops and the sauce. Enjoy!
Thursday, August 16, 2012
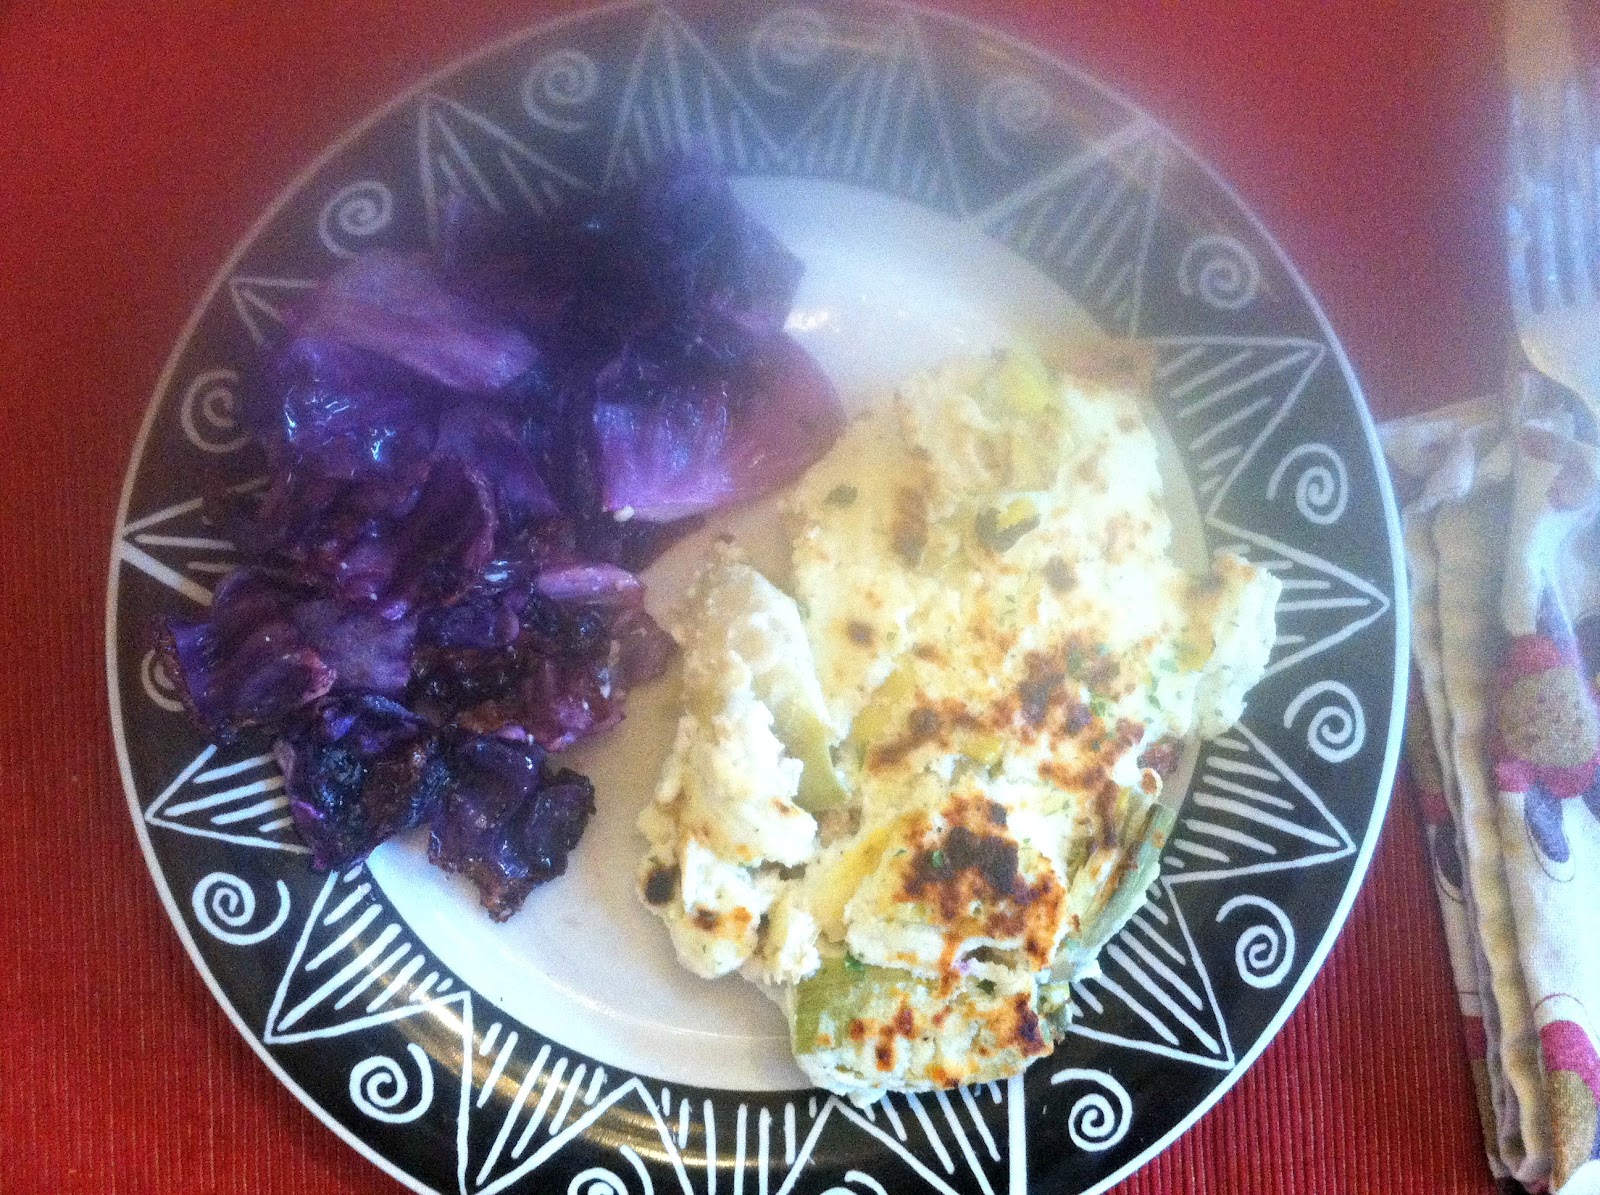
Artichoke-Ricotta Chicken
I wasn't sure what to call this dish. Basically, I took some chicken breasts, topped it with a ricotta and artichoke mixture, and broiled it in the oven until golden brown. I loved this dish so much. The ricotta gave the dish an overall light texture. But the star was the artichoke. It gave a bit of tang to the dish and you're left wanting more. You can always lighten this dish up more by using less ricotta or even low-fat. I didn't want any leftover ricotta to go bad so I used the entire small container.
Artichoke-Ricotta Chicken
Ingredients
2 large boneless chicken breasts
15 oz ricotta cheese
14.75 oz marinated artichoke hearts, quartered
2 tbsp parmesan cheese
Salt and pepper
My chicken breasts were pretty thick, so I sliced them in half to get 4 thinner chicken breasts. (This way, you can reduce the cooking time on the chicken as well.) Place a chicken breast in between saran wrap and gently pound out with a mallet. (I just wanted to increase the surface area a bit and tenderize the chicken. Don't pound it to mush.) Season both sides of the chicken with salt and pepper. Heat some olive oil in a skillet over medium high heat and cook the chicken, about 10 mins on each side.
In a small bowl, combine the ricotta, artichoke hearts, parmesan, salt and pepper to taste.
Spray a baking dish with non-stick cooking spray. Lay the cooked chicken breasts in the baking dish. Then evenly top the artichoke-ricotta mixture on each chicken. Broil in the oven until golden brown, about 10 more mins. Enjoy!
Thursday, August 9, 2012
Mini Rolo Cupcakes

Rolo in the center, Rolo in the buttercream. What's not to love? And if that wasn't enough, a bit of salt was added to the buttercream giving it that slightly salted caramel taste.
This recipe made about 4 dozen mini cupcakes. We didn't know how we were gonna eat all of them so we sent my parents home with a dozen. But by the time we reached our last cupcake, we had wished we didn't give that last dozen away. It was that good...
Mini Rolo Cupcakes
For the cupcakes you’ll need:
1 1/2 sticks unsalted butter
4 oz. unsweetened chocolate
1 c. sugar + 1 c. vanilla sugar (or 2 c. sugar)
3 eggs
1 t. vanilla
1/2 t. salt
1 c. flour
1 1/2 sticks unsalted butter
4 oz. unsweetened chocolate
1 c. sugar + 1 c. vanilla sugar (or 2 c. sugar)
3 eggs
1 t. vanilla
1/2 t. salt
1 c. flour
48 Rolos (2 12-oz. bags of Rolos will suffice for the cupcakes and buttercream)
For the buttercream you’ll need:
2 sticks unsalted butter, room temperature
For the buttercream you’ll need:
2 sticks unsalted butter, room temperature
20 Rolos
2 T. heavy cream
2 c. powdered sugar
1/2 t. + 1/8 t. salt
Directions:
Pre-heat the oven to 350 degrees (F).
To make the cupcakes, melt together the butter and unsweetened chocolate in a microwave-safe bowl on high heat for 90 seconds. Remove it from the microwave and stir until all the chocolate is melted and the mixture is smooth.
Add in the sugar, and stir until it is well combined. Mix in the eggs, one at a time, then add the vanilla and salt. Finally, stir in the flour.
Put a teaspoon of the batter into paper-lined mini cupcake tins. They should be about half full. Put one Rolo in each tin, then cover with another teaspoon of batter so the tins are about 3/4 of the way full.

Bake for about 20 minutes, until the cupcakes have set. They will give a little when you gently press your finger into the top of them, but they should not be too soft.
Allow to cool, then make the buttercream!
First, melt the Rolos with the heavy cream. You can pop it in the microwave for 30 second increments, until the caramel is smooth. Allow it to cool in the fridge for a few minutes.
Whip the butter for about 30 seconds on med-high speed, so it gets fluffy. Add in about one cup of powdered sugar, and mix until it's all combined. Once the caramel is cool to the touch, turn the mixer on medium speed and then drizzle the caramel into the frosting. If it's too hot, it'll melt the buttercream, so be patient.
Beat until fluffy. Then add in the other cup of powdered sugar and 1/2 t. of the salt. Mix and taste to see if the last 1/8 t. of salt is needed. A little goes a long way with the salt and everyone's taste preference differs, but I added the last salt addition. Lastly, frost the cupcakes and grate a few chocolate shavings over the top.
A little note: The batter is dense like a brownie, so some of the cupcakes stuck to the cupcake liners. Next time, and there will be a next time, I would try using non-stick cooking spray instead of paper liners. Update: If u do, bake them for a little less about 15 mins. It seems to bake more without the wrapper.

recipe adapted from Bake It in a Cake
Thursday, July 19, 2012
Crispy Zucchini Fries
These zucchini fries are super crispy. And all the flavors in the crispy coating eliminates the need for a dipping sauce.You could make this even healthier by baking them instead of frying. Just spray a cookie sheet with non-stick cooking spray, lay the coated zucchini fries out in a single layer, spray the fries with non-stick cooking spray and bake at 350 degrees F until golden brown.
If you ever make zucchini fries, do not, I repeat DO NOT use a wet batter! All that moisture from the wet batter and zucchini will just cause your oil to bubble up and over, and create a disaster. I might be talking from experience here *ahem*...

1/2 t. smoked paprika
1/8 t. cayenne pepper
1/2 t. salt
1/2 t. pepper
1 lemon
oil for frying
1. Prepare the zucchini: Slice your zucchini in half. Then slice the zucchini lengthwise into about 1/4 inch thick strips. Then cut into fries.
2. Prepare your workstation: In one bowl, add the flour. In another bowl, beat the eggs. In a third bowl, add the panko, Italian seasoning, onion powder, chili powder, paprika, cayenne, salt and pepper.
3. Working in batches, first dredge the zucchini fries in the flour. Shake off any excess flour and then dip in the egg wash, making sure the egg sticks to the flour-dredged zucchini fries. (This will ensure your panko coating sticks nicely.) Let the excess egg drip off. Then coat in the seasoned panko. (Press it into that panko coating if you have to. You want the fries nicely coated with the seasoned panko. This will give you your crispy zucchini fries.)
4. Fry for a few mins in 350 degrees F oil. Transfer to a paper-towel-lined plate and sprinkle with more salt. Work on frying the rest of the batches. When ready to serve, squeeze lemon juice over the fries. The lemon ties it all together very nicely. Enjoy!
If you ever make zucchini fries, do not, I repeat DO NOT use a wet batter! All that moisture from the wet batter and zucchini will just cause your oil to bubble up and over, and create a disaster. I might be talking from experience here *ahem*...
Crispy Zucchini Fries

Ingredients
1 large zucchini
1 c. flour
2 eggs
1 c. panko
1 t. Italian seasoning
1/2 t. onion powder
1/2 t. chili powder1/2 t. smoked paprika
1/8 t. cayenne pepper
1/2 t. salt
1/2 t. pepper
1 lemon
oil for frying
1. Prepare the zucchini: Slice your zucchini in half. Then slice the zucchini lengthwise into about 1/4 inch thick strips. Then cut into fries.
2. Prepare your workstation: In one bowl, add the flour. In another bowl, beat the eggs. In a third bowl, add the panko, Italian seasoning, onion powder, chili powder, paprika, cayenne, salt and pepper.
3. Working in batches, first dredge the zucchini fries in the flour. Shake off any excess flour and then dip in the egg wash, making sure the egg sticks to the flour-dredged zucchini fries. (This will ensure your panko coating sticks nicely.) Let the excess egg drip off. Then coat in the seasoned panko. (Press it into that panko coating if you have to. You want the fries nicely coated with the seasoned panko. This will give you your crispy zucchini fries.)
4. Fry for a few mins in 350 degrees F oil. Transfer to a paper-towel-lined plate and sprinkle with more salt. Work on frying the rest of the batches. When ready to serve, squeeze lemon juice over the fries. The lemon ties it all together very nicely. Enjoy!
Monday, July 16, 2012
Cheesy Breakfast Pie
This recipe is basically the Four Cheese Egg Souffle but made with puff pastry as opposed to crescent roll dough. And instead of individual ramekin servings, I just poured it all into a cast iron skillet to make one large breakfast pie. I liked this one more because it was flaky and buttery. Matt liked the Four Cheese Egg Souffle more, which was more biscuit-like. Either way, both were easy to whip up.
Cheesy Breakfast Pie
Ingredients, approx.
1 box Puff Pastry Sheets (2 sheets)
1 T. butter, melted
7 eggs
1/4 c. + 2 T. smoked mozzarella, shredded
1/4 c. + 2 T. Gruyere, shredded
1/4 c. + 2 T. apple-wood smoked cheddar, shredded
1/4 c. + 2 T. Parmesan, shredded
3 T. whole milk
3 T. cream
salt and pepper to taste
Using a pastry brush, brush the melted butter along the inside of a cast iron skillet. Carefully roll out one sheet of puff pastry and lay it into the cast iron skillet. There will be a bit of pastry hanging over the edge. You can just tear that off and press it into the skillet where it's lacking pastry.
In a large bowl, mix together 6 eggs, the cheeses, milk, cream, salt and pepper. Pour it into the prepared cast iron skillet. Then carefully unroll and lay the second puff pastry sheet over the egg mixture. If there is any pastry hanging off the edge, just fold it over onto the pie. (You don't want those excess edges to burn.)
Beat the last egg and brush it over the top of the pie. Bake at 400 degrees F for about 30 mins or until golden brown.
Why the odd measurements for the cheese:
I originally added only 4 eggs, 1/4 c. of each cheese, and 2 T. milk and cream. But when I poured that into the skillet, the mixture looked so low. So I whisked up 2 more eggs, 1/8 c. of each cheese, and another T. of milk and cream. It's all about experimenting in the kitchen. So feel free to mix up this recipe to your liking and needs.


Sunday, July 8, 2012
Grilled Lamb Breasts
I had never worked with lamb breast before. Matt likes to buy meat from the UGA meat sale and this was one of the meats he bought. I actually thought they were ribs at first, but read the packaging and found out it was lamb breast. It looked very similar to ribs, so I decided to season it up and grill it as I would ribs.
I seasoned the breasts liberally with some salt, pepper, chili powder, cumin and crushed red pepper. Because rosemary and thyme work well with lamb, I chopped some up and threw it in as well. I also decided to experiment with some ground cardamom. Cardamom is a very fragrant and sweet spice, like nutmeg. A little goes a long way. I thought it would be a nice balance with all the smoky, spicy seasoning and herbs though. I tossed the lamb with some olive oil as well and threw it on the grill. Medium heat, a few mins each side. These ribs were so flavorful. And the seasoning worked so great together. I would say the two stars were the fresh rosemary and sweet cardamom.
A note about lamb breast, it is hard to cut! I couldn't slice each rib because some of them had a spine that ran along the bottom. A butchers knife would be great here, but since we didn't have one, I just followed the bones. So my rib cuts came out a bit zig-zagged, but that didn't matter. These were tasty, cut beautifully or not.
Thursday, July 5, 2012
Illuminating Blogger Award

I have been awarded my first blog award by CJ of Food Stories! Thank you CJ for your nomination! I hope I can continue giving you illuminating, informative blog content. You can visit http://foodstoriesblog.com/illuminating-blogger-award/ to learn more about the award and check out the other great nominees.
A random thing about myself...
I have lost almost 60 lbs to date. I told you, I enjoy food more than the average person. So in order to keep my waistline in check and enjoy all the delicious food, I work out regularly. The highest I've ever hit was 180 lbs, size 13. So I started working out and lost 30 lbs over the next 3 yrs. In the past year, I have been doing the Insanity workout and am now down to 127 lbs, size 2! I have always struggled with my weight growing up, so for those of you who are in that constant battle, just keep it up! It takes time.
At this time, I would like to nominate some of my favorite blogs for the award as well:
- Eat Yourself Skinny! I always find myself staring at Kelly's food blog pics, thinking how delicious all these lightened up dishes look
- In Katrina's Kitchen You can find great stuff here, like how to make layered colored drinks
- Angie's Recipes I love Angie's blog and all the home-cooked meals she shares
- Brown Eyed Baker You can always find yummy looking treats here
- Your Cup of Cake Lizzy turns boxed cake mixes into yummy treats
Monday, July 2, 2012
Macaroni Salad with Every Color Bell Pepper
Lots of produce have been in season, including bell peppers. So when I saw all the different colored bell peppers on sale, I bought each one of them. It made this simple macaroni salad so much more colorful and fresh. Plus, it allowed me to taste each one to see if there was a difference in taste. I swear there's a slight taste difference. The orange bell pepper might be my favorite...it has a touch of sweetness to it.
Macaroni Salad with Every Color Bell Pepper
Ingredients
1 box elbow macaroni
1 red bell pepper, diced
1 orange bell pepper, diced
1 yellow bell pepper, diced
1 green bell pepper, diced
3 stalk celery, diced
1/2 c red onion, diced
1 c mayo
2 tbsp Dijon mustard
1/2 tsp sugar
1 tsp apple cider vinegar
3 tbsp Mexican crema
Salt and pepper to taste
Cook the elbow macaroni according to the package. When it's done cooking, drain and set aside to cool. In a large bowl, mix the rest of the ingredients together with the cooled macaroni. Chill in the refrigerator until ready to serve.
Tuesday, June 26, 2012
Collard Greens with Ox Tail
When Matt said "I enjoyed that more than I thought I would. You've got me liking all kinds of things now!" I knew I succeeded. See Matt can be a picky eater, so I'm always trying to challenge that.
These collard greens are so flavorful. And it's an extremely hearty dish. There are 2 secret ingredients that make this dish...
The first secret is the ox tail broth. You can get ox tail at any asian farmers market, like Super HMart. There's not much meat on ox tails, but the little bit that's there is juicy. It makes a delicious broth.
The second secret is the use of "nước mắm " or I should say "fish sauce". Now, don't get turned off. Fish sauce is commonly used in many of your asian dishes. This bottled sauce adds so much flavor to asian cuisine, and it really shows here.

Collard Greens with Ox Tail
These collard greens are so flavorful. And it's an extremely hearty dish. There are 2 secret ingredients that make this dish...
The first secret is the ox tail broth. You can get ox tail at any asian farmers market, like Super HMart. There's not much meat on ox tails, but the little bit that's there is juicy. It makes a delicious broth.
The second secret is the use of "nước mắm " or I should say "fish sauce". Now, don't get turned off. Fish sauce is commonly used in many of your asian dishes. This bottled sauce adds so much flavor to asian cuisine, and it really shows here.

 |
| nước mắm aka Fish Sauce |
3 lbs Ox tails
3-4 qt water
1 bunch collard greens
4 tsp salt
6 tbsp fish sauce
1 tbsp hot sauce
Add water to a large stockpot and bring to a boil. Add the Ox tails. Bring to a boil again. Skim the fatty froth off the top layer and discard. Turn the heat to low and cover with a lid for 30 mins. Meanwhile remove the stems from the collard greens. Then slice the leaves, about 1 inch thick. Add the sliced collard green leaves, salt, fish sauce, and hot sauce to the broth. Simmer on medium to medium-low heat for 1 hr. Serve with more fish sauce and hot sauce to taste.
Thursday, June 14, 2012
Anniversary dinner: Veal, Risotto, and Truffles
When you cook every night, what do you do for a special occasion? Cook a very fancy, expensive meal! That's what I surprised my husband with on our 3rd wedding anniversary. This meal turned out perfect. If I had a restaurant, I would definitely serve this.
This veal dish is very similar to a Veal Marsala. Instead of using Marsala though, I used Cognac.It was a nice touch, not overpowering. The mushroom cognac sauce paired so well with the veal. And the risotto was so creamy and delicious. You really get that nice, fragrant mushroom aroma from the fresh summer truffles. We really, really loved this dish and I hope you will give it a try to see why...

4 veal scallopini
1 garlic clove, minced
1 pint bella or cremini mushrooms, sliced
2 tbsp butter
1 tbsp olive oil
salt and pepper
Risotto with Asparagus and Truffles
1 tbsp butter
1 tbsp olive oil
1/2 shallot, diced
1 1/2 c arborio rice
1/2 c white wine
6 c chicken broth
1 bunch asparagus
0.3 lb brie
3 whole black summer truffles (1.4 oz jar)
1. Prepare your asparagus: Snap off the lower woody ends of the asparagus and discard it. (It will naturally break where it should.) Then using a vegetable peeler, peel off the outer layer on the bottom of the asparagus. (If you've never peeled your asparagus stems, I encourage you to do so. Ever since I discovered the tender taste of peeled asparagus I haven't prepared my asparagus any other way.) Cut your asparagus into your desired bite size. (Mine was about an inch long.) Blanch the asparagus in gently boiling water for 1-2 mins. Drain in a colander and run cold water over them to stop the asparagus from cooking. Set aside.
2. In a small saucepan, heat up the chicken broth. When it's warmed, keep the broth over low heat.
This veal dish is very similar to a Veal Marsala. Instead of using Marsala though, I used Cognac.It was a nice touch, not overpowering. The mushroom cognac sauce paired so well with the veal. And the risotto was so creamy and delicious. You really get that nice, fragrant mushroom aroma from the fresh summer truffles. We really, really loved this dish and I hope you will give it a try to see why...

Veal Scallopini with a Mushroom Cognac Sauce
flour
1/2 c cognac
1 c beef stock1 garlic clove, minced
1 pint bella or cremini mushrooms, sliced
2 tbsp butter
1 tbsp olive oil
salt and pepper
1. Lay the veal in saran wrap and gently pound the veal out a bit. Then lightly coat with some salt, pepper, and flour. In a deep skillet over medium high heat, add 1 tbsp butter and olive oil. Brown the veal, about 3 mins on each side. Transfer to a plate while you make your sauce.
2. Deglaze the pan with the cognac. Scape up the browned bits, and let the cognac reduce by half. Add the beef stock, garlic, and mushrooms. Let the sauce reduce by half. Finish with a tbsp of butter. Spoon the sauce over the veal and serve alongside these creamy risotto:
Risotto with Asparagus and Truffles
1 tbsp butter
1 tbsp olive oil
1/2 shallot, diced
1 1/2 c arborio rice
1/2 c white wine
6 c chicken broth
1 bunch asparagus
0.3 lb brie
3 whole black summer truffles (1.4 oz jar)
1. Prepare your asparagus: Snap off the lower woody ends of the asparagus and discard it. (It will naturally break where it should.) Then using a vegetable peeler, peel off the outer layer on the bottom of the asparagus. (If you've never peeled your asparagus stems, I encourage you to do so. Ever since I discovered the tender taste of peeled asparagus I haven't prepared my asparagus any other way.) Cut your asparagus into your desired bite size. (Mine was about an inch long.) Blanch the asparagus in gently boiling water for 1-2 mins. Drain in a colander and run cold water over them to stop the asparagus from cooking. Set aside.
2. In a small saucepan, heat up the chicken broth. When it's warmed, keep the broth over low heat.
3. In a large saucepan, heat the butter and olive oil over medium heat. Cook the shallots until translucent. Then add the rice and cook for a few mins. Add in the wine and cook until all the wine is absorbed. Then slowly add in a ladle of the warm chicken broth. Stir and cook until all the broth is absorbed. When the broth is absorbed, add another ladle of broth. Repeat process with the rest of the broth. (It will take about 30 mins.)
4. When you have a cup of broth left to add, go ahead and add your asparagus from earlier into the risotto. After all 6 cups of broth has been absorbed into the risotto, add 3/4 or all of the brie. (I, of course, added all the brie because we love cheese. But depending on your preference you can add as much as you'd like. I also tore the brie into smaller pieces to make incorporating easier.) Then with a microplane or grater, grate/slice the truffles into the risotto. Also add the truffle oil from the jar...you don't want to waste that flavor! Serve and enjoy your restaurant worthy meal at home.
Note: You can prepare your asparagus the day before like I did. Because the peeling can take some time and it was a workday, I wanted to prep the asparagus beforehand. And yes, do peel your asparagus. Even though it's time consuming it's very much worth it!
 |
| Matt surprised me with our wedding cake from Cecilia's Cakes...mmm! |
 |
| And surprised me with flowers at work..so sweet :) |
Thursday, June 7, 2012
Awesome taco filling/nacho topping
I have a very special guest blogger for you all today! The famous Matt Hawkins! Yup, the guy I'm always talking about in my blog posts / my wonderful husband. Matt likes to cook too and last night he made these amazing tacos. It was so good he was saying how he needs to remember this recipe. So I was like, why not blog about it! So readers, I'd like you to meet Matt!:

You will need:
For the meat:
2.5-3lb ground beef
2 cloves garlic (minced)
Smoked paprika
Chili powder
Onion powder
Salt, pepper
For the veggies:
3 medium tomatoes (seeded, diced)
1 medium red onion (diced)
1 bell pepper (diced)
1 lime (split in half)
Cilantro (to taste) diced
Salt
Cheese of choice (I used a blend of cheddar and Queso Gran (which is like manchego))
Corn tortillas (deep fried, so start heating the oil now)
First make the veggie topping, combine the bell pepper, red onion (why are they called red onions, anyone can see they are purple onions!), tomato (I like to remove the seeds and “juicy” parts for 2 reasons: 1) I don't like the taste, and 2) It will turn your little salsa into a mushy mess) and cilantro in a mixing bowl. Drizzle the lime juice on top and add salt to taste. Mix it up well and put in the fridge while you prep the tortillas and beef.
For the ground beef, sauté the garlic in a little bit of olive oil for about 2-3 minutes over medium heat. Next season the beef with salt and pepper and add it to the pan, separate the clumps so you can mix it up well in the pan (or pot). Now add the chili powder, onion powder,and paprika. You're aiming for a ratio of about 3:1:1 for these three seasonings,but feel free to adjust to your personal taste. Once the meat is browned, drain off the grease and set it aside until your chips/tacos are prepared.
Make sure your oil is nice and hot 350 degrees or so. You can either make tacos or nachos with your corn tortillas. If you're going for nachos then slice the tortillas into triangles and fry them in batches. Be careful of the rising oil, you don't want it to spill over and make a mess or worse, burn you. The nachos at the hospital aren't as good as these.Alternatively, you can make tacos from the shells. If you have a fancy-pants taco frying device, use that! Alternatively you can use tongs to hold them in a taco-type shape. One of the best methods I found was to drop the tortilla round in the oil, when it starts to rise up and float, press down in the center with the tongs. Hold it like that until it is nice and crispy (chewy tacos aren't very good) about 1-2 minutes. You can also use a dual-wielding technique with two sets of tongs to hold both ends of the shell in a taco shape. You're tacos might come out slightly misshapen, that's okay; just like the ugly duckling,these shells taste a million times better than the ones you get out of the box.
Alright, now you're ready to build! You really shouldn't need directions for this part, but just in case:
1) Take a shell/chips
2) Pile on some meat!
3) Stack it with cheese!
4) Add the veggie mix!
5) EAT!
6) Repeat as desired
Four Cheese Egg Souffle
You can enjoy this egg souffle for breakfast, or for dinner like we did. I was surprised this little souffle was so filling. It was smoky, fluffy, and flaky. Just delicious! And even though it looks involved, it was really easy to make. Most of the cooking time was either spent in the microwave or the oven. The only laborious part was rolling out the dough. But you just have to roll it out into a square which isn't that bad.

Four Cheese Egg Souffle
Ingredients
1 can of Pillsbury Refrigerated Crescent Rolls
1 tbsp butter, melted
7 eggs
1/4 c smoked mozzarella, shredded
1/4 c Gruyere, shredded
1/4 c apple-wood smoked cheddar, shredded
1/4 c Parmesan, shredded
2 tbsp whole milk
2 tbsp cream
Pinch of salt and pepper
Flour for dusting
1. Carefully unroll the crescent roll dough and separate into 4 rectangles. Pinch the diagonal perforation within each rectangle together (to make it into a solid rectangle). Dust some flour on the dough, and with a rolling pin, roll the rectangle out about an inch to make it into a square. Brush the melted butter inside 4 ramekins. Carefully lay a square inside a ramekin, leaving some of the edges hanging. Repeat with the rest of the squares.
 2. In a microwave safe bowl, add 6 of the eggs, mozzarella, gruyere, cheddar, milk, cream, salt and pepper. Beat with a fork until combined. Microwave for 30 seconds, then stir the mixture with a fork. Then stick it back in the microwave, repeating for a total of 2 mins cooking time. (The egg mixture should look like runny scrambled eggs. This will help the folded dough edges from sinking into the egg mixture.)

3. Pour equal amounts of the egg mixture into each ramekin. Top each mixture with the parmesan cheese. Fold the edges of the dough over the egg mixture. Beat the last egg, and brush it over the top of the dough in each ramekin. Bake in the oven for 20 mins at 375 degrees F or until golden brown.

Four Cheese Egg Souffle
Ingredients
1 can of Pillsbury Refrigerated Crescent Rolls
1 tbsp butter, melted
7 eggs
1/4 c smoked mozzarella, shredded
1/4 c Gruyere, shredded
1/4 c apple-wood smoked cheddar, shredded
1/4 c Parmesan, shredded
2 tbsp whole milk
2 tbsp cream
Pinch of salt and pepper
Flour for dusting
1. Carefully unroll the crescent roll dough and separate into 4 rectangles. Pinch the diagonal perforation within each rectangle together (to make it into a solid rectangle). Dust some flour on the dough, and with a rolling pin, roll the rectangle out about an inch to make it into a square. Brush the melted butter inside 4 ramekins. Carefully lay a square inside a ramekin, leaving some of the edges hanging. Repeat with the rest of the squares.
 2. In a microwave safe bowl, add 6 of the eggs, mozzarella, gruyere, cheddar, milk, cream, salt and pepper. Beat with a fork until combined. Microwave for 30 seconds, then stir the mixture with a fork. Then stick it back in the microwave, repeating for a total of 2 mins cooking time. (The egg mixture should look like runny scrambled eggs. This will help the folded dough edges from sinking into the egg mixture.)
3. Pour equal amounts of the egg mixture into each ramekin. Top each mixture with the parmesan cheese. Fold the edges of the dough over the egg mixture. Beat the last egg, and brush it over the top of the dough in each ramekin. Bake in the oven for 20 mins at 375 degrees F or until golden brown.
Thursday, May 24, 2012
Rosemary Parmesan Artichokes
Ever since I made these steamed artichokes with a cumin lime mayo I can't get enough of artichokes. This time around I decided to go a bit healthier and skip a dipping sauce. I wanted the herbs to bring the flavor to these artichokes, and they did. You could really taste the rosemary.
In the end, I preferred the other artichoke dish more. But I did learn 2 new things this time around.
1.) If you boil the artichokes, it cuts the cooking time in half! It took only 15 mins to cook these artichokes.
2.) Remove the choke after the artichoke is cooked. It will be much simpler and cleaner. I removed the choke while I was trimming the artichoke, and it was so hard! And the little hairs just kept going everywhere. Never again. So remember, remove the choke from a cooked artichoke! You've been warned...
Rosemary Parmesan Artichokes
Ingredients
1 artichoke, trimmed and halved
1 tsp Rosemary, chopped
1/2 tsp thyme, chopped
Garlic powder
Worcestershire sauce
Olive oil
1/4 c Parmesan, shredded
Add water to a large stockpot and bring to a gentle boil. Add the trimmed artichoke and cook for 15 mins. Remove the cooked artichoke and drain cut side down in a colander. In a baking dish, add the drained artichoke. Season it with the Rosemary, thyme, garlic powder, Worcestershire sauce, olive oil, and Parmesan. make sure you get in between the leaves as well. Broil in the oven for about 5-10 mins. (Or grill it, which is what I wanted to do but due to unforeseen weather I had to go to Plan B.)
Wednesday, May 16, 2012
Buttermilk Thyme Fried Chicken
What do you do when your thyme garden has been growing like crazy? Cut a huge handful and add it to this buttermilk bath for some fried chicken. That's what I did. And it was delicious! I was amazed when I took a bite of this chicken. Not only was it juicy, but the thyme really came out. It was the first flavor I tasted, making these fried chicken taste so fresh and earthy. Then you get the smokiness from the paprika.We were thinking we could experiment with other herbs, like rosemary, next time.
Buttermilk Thyme Fried Chicken
Ingredients
For the buttermilk bath:
8 chicken thighs
8 chicken legs
half a 1/2 gallon of buttermilk
1 large bundle of thyme
1 large garlic clove, smashed
3 bay leaves
2 tsp hot sauce
1/2 tsp smoked paprika
1 tsp salt
1/2 tsp pepper
For the flour dredge:
2 c all-purpose flour
1 c whole wheat flour
4 tbsp buttermilk powder
2 tbsp confectioner's sugar
1/2 tsp baking soda
1/2 tsp dry mustard
4 tsp smoked paprika
2 tsp salt
1 tsp pepper
canola oil for frying
2 tbsp of vegetable shortening
Prepare the buttermilk bath:
In a large tupperware, add all the ingredients for the buttermilk bath, and mix well. Place the lid on the tupperware and place the tupperware in the fridge. Let the chicken marinate for 4 hours.
Prepare the flour dredge by combining all the dredge ingredients in a large ziploc bag.
Add about an inch of canola oil and the vegetable shortening to a deep cast iron skillet. Heat over medium heat until a deep-fry thermometer registers 350 degrees F.
Remove the chicken pieces from the buttermilk mixture, letting the excess drip off. Transfer to the bag of seasoned flour, seal and shake to thoroughly coat. Remove from the bag and shake off any excess flour. Carefully lower the coated chicken into the oil. (Don't crowd your pan. I fried in small batches of 2-3 pieces of chicken at a time.) The temperature will drop, adjust the heat accordingly to keep the heat around 300-325 degrees F. After a few minutes, you can turn the chicken over. (You want to let it sit in oil undisturbed at first so the coating can set.) Fry a total of about 14-16 mins for thighs, and 12-14 mins for legs, turning as needed. Transfer the fried chicken onto a wire rack set over a baking sheet so it can drain, sprinkle with salt and let rest for a few minutes. Repeat with the remaining chicken.
Buttermilk Thyme Fried Chicken
Ingredients
For the buttermilk bath:
8 chicken thighs
8 chicken legs
half a 1/2 gallon of buttermilk
1 large bundle of thyme
1 large garlic clove, smashed
3 bay leaves
2 tsp hot sauce
1/2 tsp smoked paprika
1 tsp salt
1/2 tsp pepper
For the flour dredge:
 |
1 c whole wheat flour
4 tbsp buttermilk powder
2 tbsp confectioner's sugar
1/2 tsp baking soda
1/2 tsp dry mustard
4 tsp smoked paprika
2 tsp salt
1 tsp pepper
canola oil for frying
2 tbsp of vegetable shortening
Prepare the buttermilk bath:
In a large tupperware, add all the ingredients for the buttermilk bath, and mix well. Place the lid on the tupperware and place the tupperware in the fridge. Let the chicken marinate for 4 hours.
Prepare the flour dredge by combining all the dredge ingredients in a large ziploc bag.
Add about an inch of canola oil and the vegetable shortening to a deep cast iron skillet. Heat over medium heat until a deep-fry thermometer registers 350 degrees F.
Remove the chicken pieces from the buttermilk mixture, letting the excess drip off. Transfer to the bag of seasoned flour, seal and shake to thoroughly coat. Remove from the bag and shake off any excess flour. Carefully lower the coated chicken into the oil. (Don't crowd your pan. I fried in small batches of 2-3 pieces of chicken at a time.) The temperature will drop, adjust the heat accordingly to keep the heat around 300-325 degrees F. After a few minutes, you can turn the chicken over. (You want to let it sit in oil undisturbed at first so the coating can set.) Fry a total of about 14-16 mins for thighs, and 12-14 mins for legs, turning as needed. Transfer the fried chicken onto a wire rack set over a baking sheet so it can drain, sprinkle with salt and let rest for a few minutes. Repeat with the remaining chicken.
Wednesday, May 9, 2012
Steamed Artichokes with Cumin Lime Mayo
Artichokes always seem so intimidating in the grocery aisle. How do you cook it or even eat the non-canned kind? It's been on my list of things to learn and with artichokes in season I finally decided to give it a try. And it's actually a lot easier than I thought!
You first need to trim the artichoke. Cut off the top of the artichoke with a serrated knife (about an inch off the top). Then peel off the 2 bottom layers of leaves around the stem. Next, take a pair of scissors and cut of the spiny tip on the remaining leaves (about 1/4-1/2 an inch off the leave's tips). Then, using a vegetable peeler, peel the outer layer of the stem. There, now you have a trimmed artichoke! If you have more artichokes to work on trimming, keep the already trimmed artichoke in cold water with the juice of a lemon, until ready to cook.
For my first artichoke dish, I kept it simple by steaming the artichoke. In a stockpot, I simmered a couple of inches of water. Then placed a steamer basket on top. Place the trimmed artichokes in the steamer basket and cover with a lid. Cook over medium heat for 45 mins. You can stick a knife in the center and if it comes out clean it's done cooking. I made a cumin lime mayo for dipping. Mix 1/2 c mayo, 1 minced garlic clove, 1 tsp cumin, 1/2 tsp Worcestershire sauce, the juice of 1/2 a lime, and some salt and pepper to taste. Keep it in the fridge until ready to serve.
To eat the artichoke, pull off the outer leaves and scrape off the meat with your teeth. When you get to the center, that's the artichoke heart. There's a spiny, inedible "choke" in the center of the heart. Use a small spoon to remove the choke. (The choke is the very hairy thing if you're still unsure.) With the remaining artichoke heart, just chop it up and eat it. If the stem is intact you can eat that as well. Basically everything in the artichoke is edible except the spiny choke. Really, easier to prepare and eat than it looks!
Steamed Artichokes with Cumin Lime Mayo
Ingredients
2 artichokes, trimmed
1/2 c mayo
1 garlic clove, minced
1 tsp cumin
1/2 tsp Worcestershire sauce
1/2 lime, juiced
salt and pepper to taste
Simmer a couple of inches of water in a large stockpot, over medium heat. Place a steamer basket on top. (You don't want the bottom of the steamer basket touching the water.) Place the trimmed artichokes in the steamer basket, cover with a lid. Cook for 45 mins. While the artichokes are cooking, prepare the cumin lime mayo. Mix the mayo, garlic, cumin, Worcestershire sauce, lime juice, salt and pepper together and keep in the fridge until ready to serve. When the artichokes are ready for eating, serve with the cumin lime mayo as the dipping sauce.
Sunday, April 15, 2012
Corn and Poblano Salad

Matt makes a chorizo and potato taco topped with this creamed corn and poblano mixture that is amazing. For a cookout we were going to, I wanted to make something similar. Instead of using mexican crema like Matt's version, I decided to use queso fresco so it'd be easier to eat as a side dish. We've recently discovered queso fresco. It's a really light cheese - kinda like a Mexican feta cheese. I love it. I kept picking at it while making this dish (guilty). But it's great for crumbling, like in this dish, not so much for melting.
This side dish is sweet from the corn and spicy from the poblano peppers. The paprika and cumin added a touch of smokiness to the dish. And yes, I used 24 oz of queso fresco, but all the cheese helps mellow out the spiciness. This dish would be great topped on a taco as well.
Corn and Poblano Salad
Ingredients
3 ears yellow corn, kernels removed
3 poblano peppers
1 onion, diced
24 oz queso fresco
1 tsp smoked paprika
1/2 tsp cumin
1 tsp salt
1/2 tsp pepper
2-3 tbsp olive oil
First, roast the poblano peppers on the grill until charred on all sides. Then place in a bag to steam for 10 mins. Remove from the bag and using a knife, scrape off the charred skin. Remove the stem and seeds from the poblano peppers. Slice the peppers into strips and then dice.
In a deep medium skillet, heat about 2-3 tbsp of olive oil over medium heat. Add the diced onions and cook for about 5 mins until translucent. Then add the corn and cook for about 3 mins. Then add the diced poblano peppers, smoked paprika, cumin, salt and pepper and cook for about 1 min. Remove from the heat and transfer to a large bowl. Crumble half the queso fresco into the salad and mix. Set aside and chill in the fridge. When ready to serve, crumble the rest of the queso fresco into the salad. Enjoy!
Thursday, March 29, 2012
Chicken Club Sandwich
This is a yummy sandwich that was easy to put together. I simply grilled some chicken breasts in olive oil, that had been seasoned with salt and pepper. Just keep it simple because you want the toppings to stand out. Place the chicken breast on some potato buns. Top the chicken with some crispy bacon, avocado slices, and honey mustard. Easy! And so yummy! I loved the avocado in this. It added a touch of freshness and creaminess to the sandwich. And the sweetness of the honey mustard played well with the avocado, tying everything together. I made my own honey mustard. Just mixed about 1/2 c mustard, 1/4 c mayo, 1 tbsp whole grain mustard, 2-3 tbsp honey, and some salt and pepper. Just play around with the measurements to your taste bud's liking.
Wednesday, March 7, 2012
Bacon and Leek-Filled Ravioli
My typical weekday: get up, get ready, commute an hour to work, work an 8-hour day, commute home, exercise, prepare dinner, watch a couple of shows, and then bedtime so I can be refreshed for another busy day. I feel like I have no free time! I could easily not work out and order fast food, but you gotta make time for the little things that matter. Plus, I wouldn't be 50 lbs lighter and able to enjoy all the delicious food that surrounds us if I didn't sacrifice some of my time. But unfortunately, that also means that I have neglected my food blog for a bit, and for that I am sorry!
I made these bacon and leek-filled ravioli with some of the fresh pasta dough posted way back. Instead of cutting the pasta dough into fettuccine noodles, just cut it into squares with a knife or into circles with a round cookie cutter. Then put a little bit of filling into the center, take another square/round pasta sheet and pinch the ends together tightly. I just used my fingers to pinch the ends together, which worked just fine. I even experimented with using a fork to seal the ends which just made it look prettier.
For this dish, I used the dark green ends of the leek that you would normally throw away. I wanted to see if we could cook with it. Why not? There's actually still flavor left in those little ends. This ravioli was surprisingly not as heavy as it sounded either. The ricotta cheese lightened up the dish a bit. There was so much flavor, it was delicious.
Bacon and Leek-Filled Ravioli
Ingredients
8-10 slices of bacon
1 c leeks, sliced
1 1/2 c ricotta cheese
1 tbsp butter
1 tbsp flour
2 c heavy cream
2 c pecorino cheese
1 tbsp parsley, chopped
salt and pepper
Over medium heat, cook the bacon until crispy. Transfer to a paper towel-lined plate to drain. Save half of the bacon dripping. In the same pan, add the leeks. Cook until tender, about 5 mins. Crumble the bacon and add it to a small bowl along with the cooked leeks, ricotta cheese, and half the pecorino. Mix well and add salt and pepper to taste. This is the filling for your ravioli.
In the same pan you cooked your bacon and leeks in, add the rest of the bacon dripping saved earlier and the butter, cooking over medium-high heat. Add the flour and cook for about a min so the raw flour cooks out. Then slowly whisk in the cream. Bring it to a boil, then reduce to a simmer. Add in the rest of the pecorino (add more if you wish!). Cook for a few more mins so the sauce can thicken up. Salt and pepper to taste as needed.
Toss the bacon and leek-filled ravioli prepared earlier into the cream. Top with parsley and more pecorino. Enjoy!
Monday, February 13, 2012
Brown Butter Cupcakes with Brown Buttercream Frosting

There's this local bakery near us called Gimme Some Suga that makes these delicious browned butter cupcakes. Ever since I tried them last summer, browned butter has been on my to-do list. I came across a browned butter cupcake recipe on Foodbuzz and had to give it a try, hoping they'd taste just like the one in the bakery. It wasn't as heavenly, but they were still good. These cupcakes were so light and fluffy. You can taste the nutty browned butter aroma in the cupcake for sure, but not so much in the frosting (which was pretty sweet by the way). Either I didn't brown the butter enough for the frosting (since it called for twice as much) or maybe my substitution of milk masked the browned butter? Either way these cupcakes were still really good.
Browned Butter Cake Ingredients
 1 cup browned Butter, cooled
2 & 1/2 cups Sugar
5 – Eggs, separated
1 teaspoon Vanilla Extract
1 cup Buttermilk
3 cups sifted Cake Flour
1 teaspoon Baking Powder
1 teaspoon Baking Soda
pinch of Salt
Browned Butter Directions:
To make 1 cup of browned butter: Slice the unsalted butter stick into 1 tbsp sized slices. Heat a thick-bottomed skillet on medium heat. Add the sliced butter (sliced so that the butter melts more evenly) whisking frequently. Continue to cook the butter. Once melted the butter will foam up a bit, then subside. Watch carefully as lightly browned specks begin to form at the bottom of the pan. (About 7 mins total cooking time.) Smell the butter; it should have a nutty aroma. Remove from heat and place on a cool surface to help stop the butter from cooking further and perhaps burning.
Cake Directions:
 Allow ingredients to come to room temperature.
Preheat oven to 350 degrees.
In a medium bowl, beat cooled brown butter with sugar for 3 minutes.
Add egg yolks one at a time and vanilla and beat for another 3 minutes.
Sift dry ingredients and add to butter/egg mixture alternately with buttermilk, beginning and ending with the dry ingredients.
Mix just till combined.
In another bowl and clean beaters, beat egg whites till stiff and add in an increment of 3 to cake batter, being sure to fold in thoroughly but gently.
Bake for 18 or so minutes for cupcakes and 20-25 minutes for 9 inch round cake pans.
Makes 3 dozen cupcakes or 3, 9 inch round cake pans.

Browned Buttercream Frosting
2 cups browned Butter, cooled and solidified
1 teaspoon Vanilla Extract
1/3 cup whole milk, plus another 1/3 cup
2 lb. Powdered Sugar, sifted
Directions
In a medium bowl, add butter and whip till light and creamy, about 3 minutes.
Add vanilla extract and 1/3 cup milk and blend.
Slowly add powdered sugar while mixing.
At this point you may need to add more liquid. I added another 1/3 cup to achieve a spreadable and fluffy consistency. Whip for several minutes.

Adapted from Apron of Grace and Simply Recipes
Happy Valentine's Day!
Wednesday, January 18, 2012
Lemon-Pepper Fettuccine Alfredo
Has any else noticed that Kroger is popping up everywhere? There was one down the road near us to the left. Now there's an even bigger one on the right. But I'm not complaining because this new, closer Kroger isn't only bigger, but they have a Murray's cheese shop! You know I love cheese. While browsing their cheese selection, I came across Sartoi's Signature Bellavitano cheese. It's a well-aged parmesan, with the nuttiness of sharp cheddar, soaked in merlot. Sounded interesting and smelt great. I thought I would try it in this lemon-pepper fettuccine alfredo. Feel free to use whatever parmesan cheese you can get though.
If you've never tried a lemon-pepper fettuccine, you should. It's creamy and peppery. Adds a touch more flavor to a regular fettuccine alfredo.
 Lemon-Pepper Fettuccine Alfredo
In a deep skillet over medium-high heat, melt the butter. Add the garlic and shallot and cook till translucent. In a small bowl, mix the cream, lemon juice and egg together. Then slowly stir the liquid mixture into the skillet. Let it come to a boil, then reduce to a simmer. Stir in both cheeses, a little at a time to make sure it's incorporated. Let the sauce simmer for about 5 mins so it can thicken up. Season with salt and pepper. Add the cooked fettuccine noodles and parsley and toss to coat. You can cook on low for a couple more mins to thicken up the sauce more, or you can add some of the pasta water to loosen up, completely optional. to your liking Serve with more cheese on top.
If you've never tried a lemon-pepper fettuccine, you should. It's creamy and peppery. Adds a touch more flavor to a regular fettuccine alfredo.
 Lemon-Pepper Fettuccine Alfredo
Ingredients
2 tbsp butter
1 clove garlic, minced
1 shallot, minced
1 pint cream
1/2 lemon, juiced
1 egg
1/2 c Sartoi's Signature Bellavitano cheese, shredded
1/4 c Formaggio Trio Parmesan, Asiago, Romano, shredded
1 tsp pepper
1/2 tsp salt
1 tbsp chopped parsley
1/2 lb Fresh Fettuccine, cookedIn a deep skillet over medium-high heat, melt the butter. Add the garlic and shallot and cook till translucent. In a small bowl, mix the cream, lemon juice and egg together. Then slowly stir the liquid mixture into the skillet. Let it come to a boil, then reduce to a simmer. Stir in both cheeses, a little at a time to make sure it's incorporated. Let the sauce simmer for about 5 mins so it can thicken up. Season with salt and pepper. Add the cooked fettuccine noodles and parsley and toss to coat. You can cook on low for a couple more mins to thicken up the sauce more, or you can add some of the pasta water to loosen up, completely optional. to your liking Serve with more cheese on top.
Sunday, January 15, 2012
Easy Hashbrown Casserole

Ingredients
1 c bisquick mix
1 c buttermilk
4 eggs
1 c shredded cheddar cheese, plus more for topping
1 tsp salt
1/2 tsp pepper
4 oz cream cheese, cubed
6 c frozen hash brown
Preheat the oven to 400 degrees F. In a large bowl whisk the bisquick mix and buttermilk together. Then whisk in the eggs. Next the cheese, salt and pepper. Then add the cream cheese and hash brown. Mix well. Pour into a buttered 9x13 baking dish. Sprinkle the top with more cheese. Cover with aluminum foil. Bake for 30 mins. Then uncover and bake another 10 mins or until cheese is golden brown.

This morning, I just threw together a bunch of leftover ingredients we had. The end result was a very simple, easy, and tasty breakfast dish!
Saturday, January 14, 2012
Homemade Fettuccine with a Truffle-Dill Sauce
Remember that lamb sandwich Matt loved so much? Well I used the left over truffle cheese and dill to make this dish tossing it with my homemade fettuccine noodles. Yes, I know this blog post is long over-due. For that I am sorry. But I will make it up to you with a pasta dish that seems really fancy, but was actually inexpensive to make.
At first glance, you'd think it was a fettuccine alfredo. But when you bite into it, you are surprised at how much flavor this dish has. The earthy truffle and fresh dill really comes out in this creamy, rich pasta dish. I am loving this truffle cheese, and loving Sam's Club more for carrying it.
Homemade Fettuccine with a Truffle-Dill Sauce
Ingredients

2 tbsp butter
2 tbsp flour
1 pint cream
1 1/2 c truffle cheese, shredded
1 tbsp dill, chopped
salt and pepper
1/2 lb fettuccine, cooked
In a deep skillet over medium-high heat, melt the butter. Then add in the flour, cooking for about a min to cook out the raw flour taste. Slowly whisk in the cream. Let it come to a boil, then reduce to a simmer. Whisk in the truffle cheese, a little at a time so it can incorporate. Add the dill, and salt and pepper to taste. Simmer for about 5 mins so the sauce can thicken up. Toss in the cooked fettuccine noodles and serve warm.

Subscribe to:
Posts (Atom)