I wasn't sure what to call this dish. Basically, I took some chicken breasts, topped it with a ricotta and artichoke mixture, and broiled it in the oven until golden brown. I loved this dish so much. The ricotta gave the dish an overall light texture. But the star was the artichoke. It gave a bit of tang to the dish and you're left wanting more. You can always lighten this dish up more by using less ricotta or even low-fat. I didn't want any leftover ricotta to go bad so I used the entire small container.
Artichoke-Ricotta Chicken
Ingredients
2 large boneless chicken breasts
15 oz ricotta cheese
14.75 oz marinated artichoke hearts, quartered
2 tbsp parmesan cheese
Salt and pepper
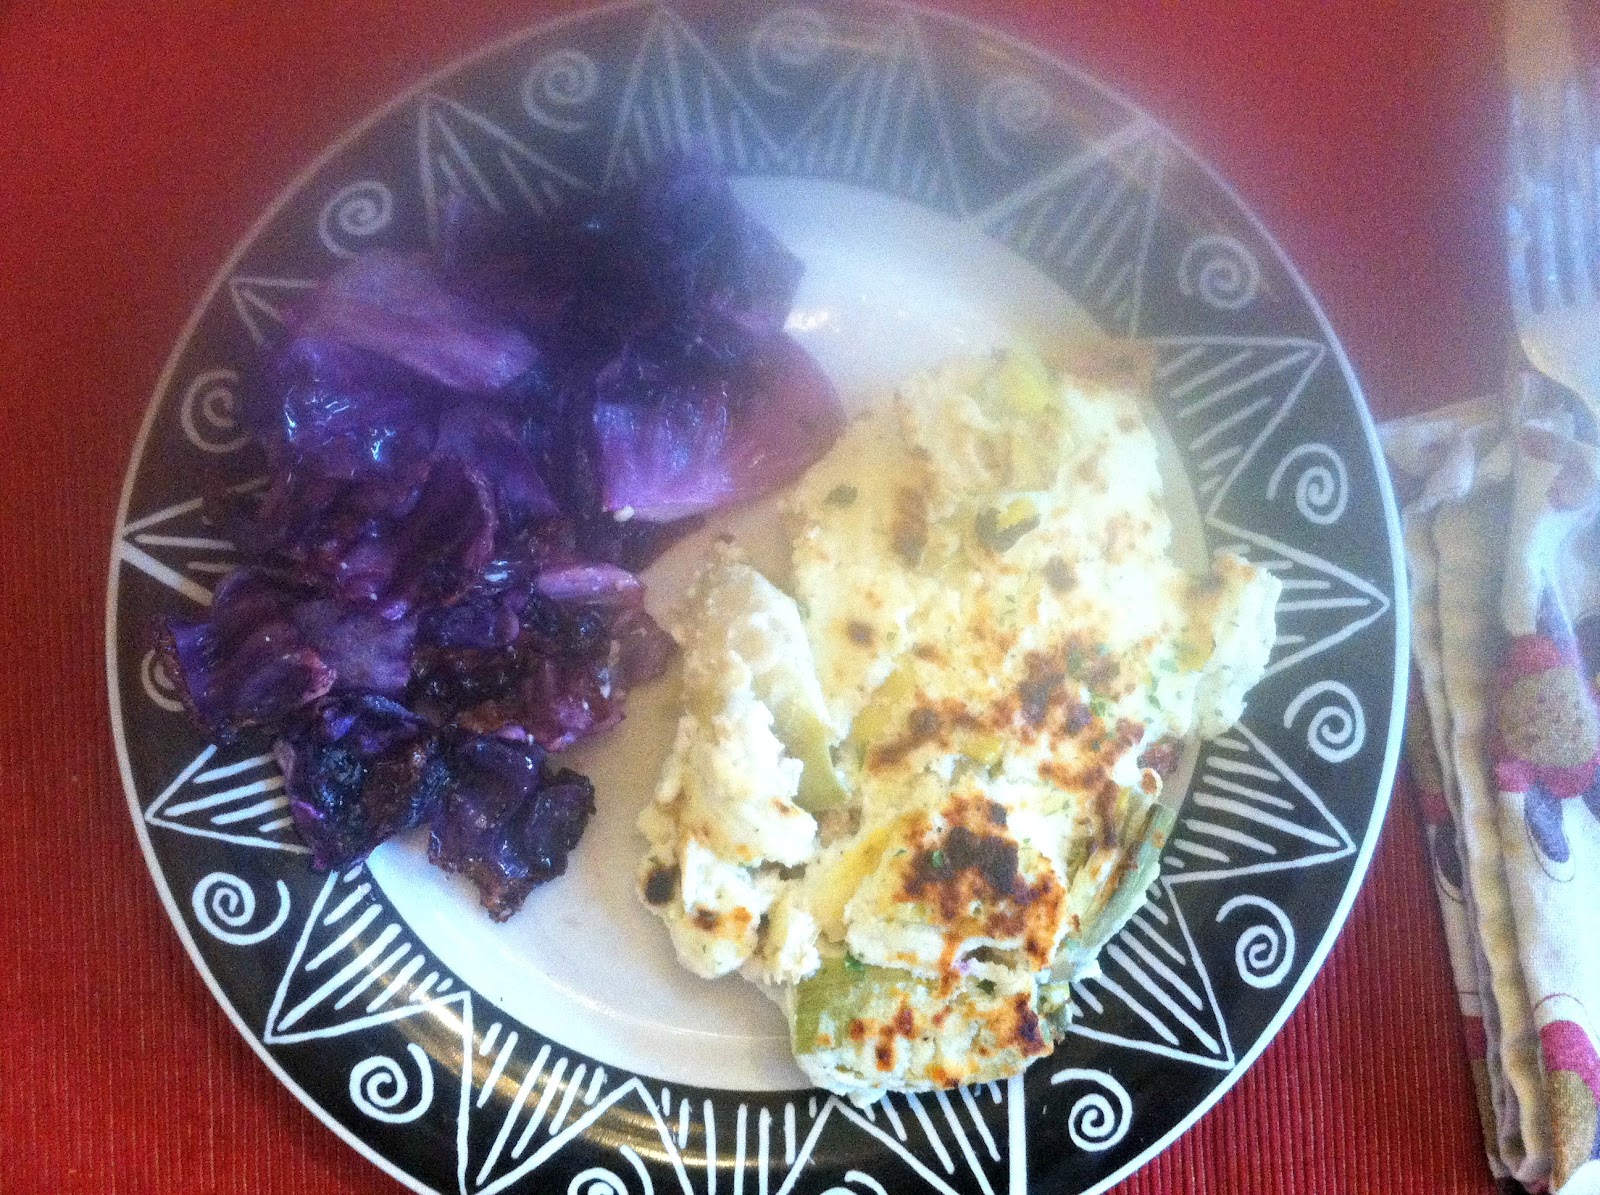
My chicken breasts were pretty thick, so I sliced them in half to get 4 thinner chicken breasts. (This way, you can reduce the cooking time on the chicken as well.) Place a chicken breast in between saran wrap and gently pound out with a mallet. (I just wanted to increase the surface area a bit and tenderize the chicken. Don't pound it to mush.) Season both sides of the chicken with salt and pepper. Heat some olive oil in a skillet over medium high heat and cook the chicken, about 10 mins on each side.
In a small bowl, combine the ricotta, artichoke hearts, parmesan, salt and pepper to taste.
Spray a baking dish with non-stick cooking spray. Lay the cooked chicken breasts in the baking dish. Then evenly top the artichoke-ricotta mixture on each chicken. Broil in the oven until golden brown, about 10 more mins. Enjoy!
Thursday, August 16, 2012
Thursday, August 9, 2012
Mini Rolo Cupcakes
Rolo in the center, Rolo in the buttercream. What's not to love? And if that wasn't enough, a bit of salt was added to the buttercream giving it that slightly salted caramel taste.
This recipe made about 4 dozen mini cupcakes. We didn't know how we were gonna eat all of them so we sent my parents home with a dozen. But by the time we reached our last cupcake, we had wished we didn't give that last dozen away. It was that good...
Mini Rolo Cupcakes
For the cupcakes you’ll need:
1 1/2 sticks unsalted butter
4 oz. unsweetened chocolate
1 c. sugar + 1 c. vanilla sugar (or 2 c. sugar)
3 eggs
1 t. vanilla
1/2 t. salt
1 c. flour
1 1/2 sticks unsalted butter
4 oz. unsweetened chocolate
1 c. sugar + 1 c. vanilla sugar (or 2 c. sugar)
3 eggs
1 t. vanilla
1/2 t. salt
1 c. flour
48 Rolos (2 12-oz. bags of Rolos will suffice for the cupcakes and buttercream)
For the buttercream you’ll need:
2 sticks unsalted butter, room temperature
For the buttercream you’ll need:
2 sticks unsalted butter, room temperature
20 Rolos
2 T. heavy cream
2 c. powdered sugar
1/2 t. + 1/8 t. salt
Directions:
Pre-heat the oven to 350 degrees (F).
To make the cupcakes, melt together the butter and unsweetened chocolate in a microwave-safe bowl on high heat for 90 seconds. Remove it from the microwave and stir until all the chocolate is melted and the mixture is smooth.
Add in the sugar, and stir until it is well combined. Mix in the eggs, one at a time, then add the vanilla and salt. Finally, stir in the flour.
Put a teaspoon of the batter into paper-lined mini cupcake tins. They should be about half full. Put one Rolo in each tin, then cover with another teaspoon of batter so the tins are about 3/4 of the way full.
Bake for about 20 minutes, until the cupcakes have set. They will give a little when you gently press your finger into the top of them, but they should not be too soft.
Allow to cool, then make the buttercream!
First, melt the Rolos with the heavy cream. You can pop it in the microwave for 30 second increments, until the caramel is smooth. Allow it to cool in the fridge for a few minutes.
Whip the butter for about 30 seconds on med-high speed, so it gets fluffy. Add in about one cup of powdered sugar, and mix until it's all combined. Once the caramel is cool to the touch, turn the mixer on medium speed and then drizzle the caramel into the frosting. If it's too hot, it'll melt the buttercream, so be patient.
Beat until fluffy. Then add in the other cup of powdered sugar and 1/2 t. of the salt. Mix and taste to see if the last 1/8 t. of salt is needed. A little goes a long way with the salt and everyone's taste preference differs, but I added the last salt addition. Lastly, frost the cupcakes and grate a few chocolate shavings over the top.
A little note: The batter is dense like a brownie, so some of the cupcakes stuck to the cupcake liners. Next time, and there will be a next time, I would try using non-stick cooking spray instead of paper liners. Update: If u do, bake them for a little less about 15 mins. It seems to bake more without the wrapper.
recipe adapted from Bake It in a Cake
Thursday, July 19, 2012
Crispy Zucchini Fries
These zucchini fries are super crispy. And all the flavors in the crispy coating eliminates the need for a dipping sauce.You could make this even healthier by baking them instead of frying. Just spray a cookie sheet with non-stick cooking spray, lay the coated zucchini fries out in a single layer, spray the fries with non-stick cooking spray and bake at 350 degrees F until golden brown.
If you ever make zucchini fries, do not, I repeat DO NOT use a wet batter! All that moisture from the wet batter and zucchini will just cause your oil to bubble up and over, and create a disaster. I might be talking from experience here *ahem*...
1/2 t. smoked paprika
1/8 t. cayenne pepper
1/2 t. salt
1/2 t. pepper
1 lemon
oil for frying
1. Prepare the zucchini: Slice your zucchini in half. Then slice the zucchini lengthwise into about 1/4 inch thick strips. Then cut into fries.
2. Prepare your workstation: In one bowl, add the flour. In another bowl, beat the eggs. In a third bowl, add the panko, Italian seasoning, onion powder, chili powder, paprika, cayenne, salt and pepper.
3. Working in batches, first dredge the zucchini fries in the flour. Shake off any excess flour and then dip in the egg wash, making sure the egg sticks to the flour-dredged zucchini fries. (This will ensure your panko coating sticks nicely.) Let the excess egg drip off. Then coat in the seasoned panko. (Press it into that panko coating if you have to. You want the fries nicely coated with the seasoned panko. This will give you your crispy zucchini fries.)
4. Fry for a few mins in 350 degrees F oil. Transfer to a paper-towel-lined plate and sprinkle with more salt. Work on frying the rest of the batches. When ready to serve, squeeze lemon juice over the fries. The lemon ties it all together very nicely. Enjoy!
If you ever make zucchini fries, do not, I repeat DO NOT use a wet batter! All that moisture from the wet batter and zucchini will just cause your oil to bubble up and over, and create a disaster. I might be talking from experience here *ahem*...
Crispy Zucchini Fries
Ingredients
1 large zucchini
1 c. flour
2 eggs
1 c. panko
1 t. Italian seasoning
1/2 t. onion powder
1/2 t. chili powder1/2 t. smoked paprika
1/8 t. cayenne pepper
1/2 t. salt
1/2 t. pepper
1 lemon
oil for frying
1. Prepare the zucchini: Slice your zucchini in half. Then slice the zucchini lengthwise into about 1/4 inch thick strips. Then cut into fries.
2. Prepare your workstation: In one bowl, add the flour. In another bowl, beat the eggs. In a third bowl, add the panko, Italian seasoning, onion powder, chili powder, paprika, cayenne, salt and pepper.
3. Working in batches, first dredge the zucchini fries in the flour. Shake off any excess flour and then dip in the egg wash, making sure the egg sticks to the flour-dredged zucchini fries. (This will ensure your panko coating sticks nicely.) Let the excess egg drip off. Then coat in the seasoned panko. (Press it into that panko coating if you have to. You want the fries nicely coated with the seasoned panko. This will give you your crispy zucchini fries.)
4. Fry for a few mins in 350 degrees F oil. Transfer to a paper-towel-lined plate and sprinkle with more salt. Work on frying the rest of the batches. When ready to serve, squeeze lemon juice over the fries. The lemon ties it all together very nicely. Enjoy!
Monday, July 16, 2012
Cheesy Breakfast Pie
This recipe is basically the Four Cheese Egg Souffle but made with puff pastry as opposed to crescent roll dough. And instead of individual ramekin servings, I just poured it all into a cast iron skillet to make one large breakfast pie. I liked this one more because it was flaky and buttery. Matt liked the Four Cheese Egg Souffle more, which was more biscuit-like. Either way, both were easy to whip up.
Cheesy Breakfast Pie
Ingredients, approx.
1 box Puff Pastry Sheets (2 sheets)
1 T. butter, melted
7 eggs
1/4 c. + 2 T. smoked mozzarella, shredded
1/4 c. + 2 T. Gruyere, shredded
1/4 c. + 2 T. apple-wood smoked cheddar, shredded
1/4 c. + 2 T. Parmesan, shredded
3 T. whole milk
3 T. cream
salt and pepper to taste
Using a pastry brush, brush the melted butter along the inside of a cast iron skillet. Carefully roll out one sheet of puff pastry and lay it into the cast iron skillet. There will be a bit of pastry hanging over the edge. You can just tear that off and press it into the skillet where it's lacking pastry.
In a large bowl, mix together 6 eggs, the cheeses, milk, cream, salt and pepper. Pour it into the prepared cast iron skillet. Then carefully unroll and lay the second puff pastry sheet over the egg mixture. If there is any pastry hanging off the edge, just fold it over onto the pie. (You don't want those excess edges to burn.)
Beat the last egg and brush it over the top of the pie. Bake at 400 degrees F for about 30 mins or until golden brown.
Why the odd measurements for the cheese:
I originally added only 4 eggs, 1/4 c. of each cheese, and 2 T. milk and cream. But when I poured that into the skillet, the mixture looked so low. So I whisked up 2 more eggs, 1/8 c. of each cheese, and another T. of milk and cream. It's all about experimenting in the kitchen. So feel free to mix up this recipe to your liking and needs.
Sunday, July 8, 2012
Grilled Lamb Breasts
I had never worked with lamb breast before. Matt likes to buy meat from the UGA meat sale and this was one of the meats he bought. I actually thought they were ribs at first, but read the packaging and found out it was lamb breast. It looked very similar to ribs, so I decided to season it up and grill it as I would ribs.
I seasoned the breasts liberally with some salt, pepper, chili powder, cumin and crushed red pepper. Because rosemary and thyme work well with lamb, I chopped some up and threw it in as well. I also decided to experiment with some ground cardamom. Cardamom is a very fragrant and sweet spice, like nutmeg. A little goes a long way. I thought it would be a nice balance with all the smoky, spicy seasoning and herbs though. I tossed the lamb with some olive oil as well and threw it on the grill. Medium heat, a few mins each side. These ribs were so flavorful. And the seasoning worked so great together. I would say the two stars were the fresh rosemary and sweet cardamom.
A note about lamb breast, it is hard to cut! I couldn't slice each rib because some of them had a spine that ran along the bottom. A butchers knife would be great here, but since we didn't have one, I just followed the bones. So my rib cuts came out a bit zig-zagged, but that didn't matter. These were tasty, cut beautifully or not.
Thursday, July 5, 2012
Illuminating Blogger Award
I have been awarded my first blog award by CJ of Food Stories! Thank you CJ for your nomination! I hope I can continue giving you illuminating, informative blog content. You can visit http://foodstoriesblog.com/illuminating-blogger-award/ to learn more about the award and check out the other great nominees.
A random thing about myself...
I have lost almost 60 lbs to date. I told you, I enjoy food more than the average person. So in order to keep my waistline in check and enjoy all the delicious food, I work out regularly. The highest I've ever hit was 180 lbs, size 13. So I started working out and lost 30 lbs over the next 3 yrs. In the past year, I have been doing the Insanity workout and am now down to 127 lbs, size 2! I have always struggled with my weight growing up, so for those of you who are in that constant battle, just keep it up! It takes time.
At this time, I would like to nominate some of my favorite blogs for the award as well:
- Eat Yourself Skinny! I always find myself staring at Kelly's food blog pics, thinking how delicious all these lightened up dishes look
- In Katrina's Kitchen You can find great stuff here, like how to make layered colored drinks
- Angie's Recipes I love Angie's blog and all the home-cooked meals she shares
- Brown Eyed Baker You can always find yummy looking treats here
- Your Cup of Cake Lizzy turns boxed cake mixes into yummy treats
Monday, July 2, 2012
Macaroni Salad with Every Color Bell Pepper
Lots of produce have been in season, including bell peppers. So when I saw all the different colored bell peppers on sale, I bought each one of them. It made this simple macaroni salad so much more colorful and fresh. Plus, it allowed me to taste each one to see if there was a difference in taste. I swear there's a slight taste difference. The orange bell pepper might be my favorite...it has a touch of sweetness to it.
Macaroni Salad with Every Color Bell Pepper
Ingredients
1 box elbow macaroni
1 red bell pepper, diced
1 orange bell pepper, diced
1 yellow bell pepper, diced
1 green bell pepper, diced
3 stalk celery, diced
1/2 c red onion, diced
1 c mayo
2 tbsp Dijon mustard
1/2 tsp sugar
1 tsp apple cider vinegar
3 tbsp Mexican crema
Salt and pepper to taste
Cook the elbow macaroni according to the package. When it's done cooking, drain and set aside to cool. In a large bowl, mix the rest of the ingredients together with the cooled macaroni. Chill in the refrigerator until ready to serve.
Subscribe to:
Comments (Atom)

